
Once upon a time I set my eyes upon a rope credenza at a property that we visit annually on the East Coast. The second I saw it I thought, “I could make that”. And alas, the time has come. Our den walls are plaster so we cannot hide our TV wires within the walls. We will hang a Samsung Frame TV and hide the wires in a credenza. Since I was not originally planning on needing this piece of furniture, I wanted something simple and inexpensive while still appearing high end. I covered the entire IKEA Henmes sideboard in rope. (Naturally!)
Supply List: 1) IKEA Henmes sideboard, light brown, 2) 1,200 feet of 5/16″ Manila Rope, 3) Glue gun and glue sticks, 4) A paintbrush like this, 5) New knobs (optional) and longer screws to fit (rope requires screws to be slightly longer)
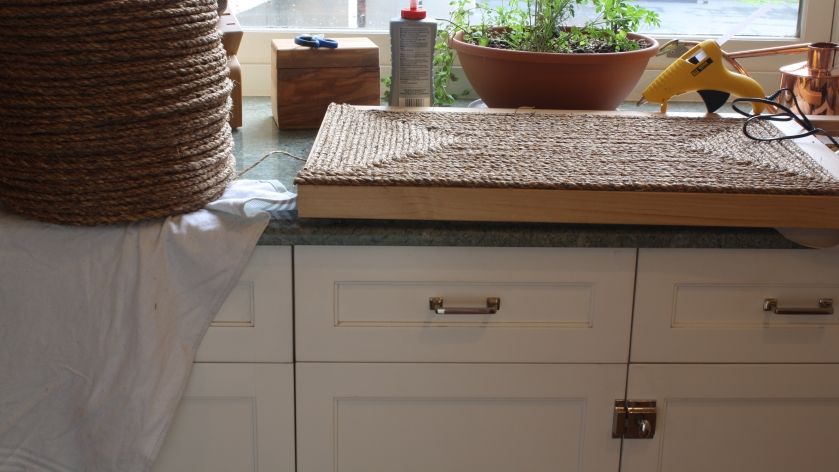
Pro Tip: This project took me 14 hours start to finish, so you need a weekend. I’d also recommend a very sharp knife and scissors for cutting the rope.

Mecox has some interesting rope covered furniture that serves as a nice inspiration for this project. While I won’t be exactly mimicking this piece, I liked it very much.

The rope I am working with is from Knot & Rope supply.

Beginning with the drawer fronts, work from the outside in to cover them in rope. Do the same with the top of the sideboard. For the drawers, I worked from the center out because I wanted to make sure I wasn’t covering the holes for the drawer pulls, but in retrospect I think this was a harder path. It was harder because I had to measure in from the outer edge to make sure I was starting in the right place.

For the cabinet doors and sides I wrapped the center section first, similar to the top and the drawers, but cut separate strips for the outer border.

I cut the rope with a Global knife that I will be taking to get sharped on Tuesday. Not to say it’s dull now, I’m just expecting that is possible…

After the credenza was assembled, I glued down the trim pieces.

I appreciate that I am did not go into too much detail here, but I am expecting the likelihood of some fellow-crafter following in my footsteps to DIY this piece is somewhere around 0% (rounding). So, please reach out to me if you do want to do this, and I can help guide you through.

I will have a piece of glass cut to top this off and help protect from dust. The knobs were replaced with cast iron knobs that I found online for $20. The Samsung frame tv will have a maple frame that is still on it’s way to us.

Hi. I love your rope credenza. My piece is already in tact. Is it possible to do it anyways? And does glue gun hold up? Or should I use a stronger glue?
LikeLike
If you are moving forward with this project I have a few suggestions – First, use cotton rope – I believe that will be more pliable and easier to glue down than the actual hardware store rope that I used. If I could do it again, I’d use a cotton rope. It will be difficult to do this if already assembled, but i think it could work with hot glue. You will have to put paper underneath the piece so your hot glue doesn’t drip down and ruin your floor.. You may also need to hold the rope with your hand longer, so that the glue can set, on the vertical sides. I would remove the doors and drawers to do their faces to lay flat to dry where gravity is on your side. I know I am responding late – let me know if you tried this and how it went!
LikeLike